So here we are in March! March is a little bit wonderful and a little bit rotten—it teases you with sunshine and then dumps some cold weather on you just for sport. But I’m keeping a good thought for spring!

A few snapshots from my garden:

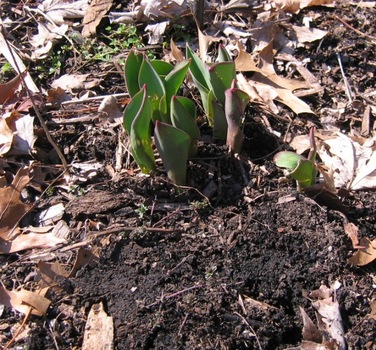
Tulips soon to make their entrance . . . .
Picture
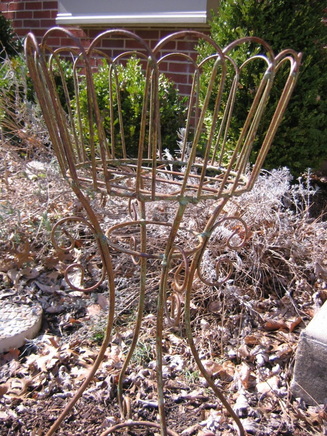
A basket soon to be filled with annuals . . .
Picture
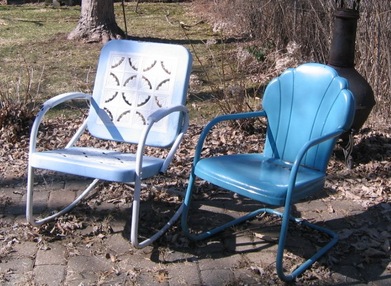
Chairs soon to be rocked . . .
Picture
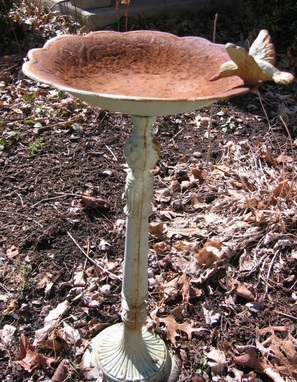
A birdbath soon to be splashed in . . .
Picture
 Despite its fickle weather, March is a great month for celebrations. I mean, it’s National Craft Month and Women’s History Month! Women, history, sewing: Could there be a more perfect combo? Hmm, if only there was a book about this or something, right?

Anyway, I was honored to write a guest blog about the history of women and sewing for the lovely Natalie over at the Craftzine blog. Check it out here, and put in your two cents if you get a chance!

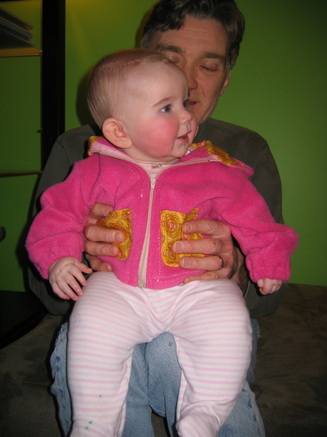
Also, I decided March was the month that my little baby girl should finally have, you know, a jacket (we just relied on blanket-bundling to get through the winter).
Picture
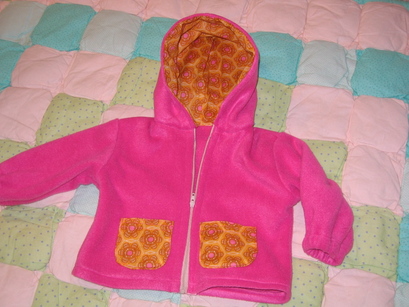
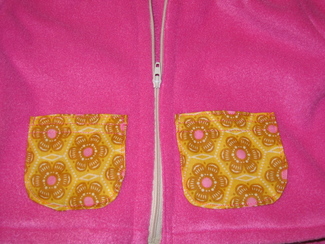
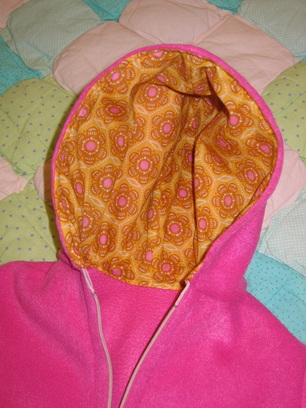
 I found a fleece as a remnant at Jo-Ann’s and it had pink prettiness written all over it. I used Simplicity pattern 5316 , but modified it some. I used an Anna Maria Horner print (one of the prints that came in the fabric stack)  to make the pockets and to line the hood (the pattern doesn’t call for lining the hood, but I wanted the fun contrast).
Picture
Picture
It’s an easy pattern to follow, and even if you’ve never done a separating zipper, the directions walk you through it very well (it had been a few years since I did one). It gets mighty bulky at the bottom, but just solider through it and even if it’s slightly crooked, it will still be okay.
Picture
Picture
So, let's all channel spring and the amazing stories of women throughout history. And maybe go make a pretty spring jacket for yourself (or your kid) if you don't have one! It will make you happy, I promise.
 
So I’ve been searching for the perfect toddler T-shirt pattern for a while. I’ve tried making my own, and I never get the neck proportion right. I also tried sizing down a larger kids’ pattern to fix my Max (who is almost two-and-a-half). But the results were less than great.

Finally, I’ve found my go-to T-shirt pattern and I love it! It’s Simplicity 5317, and though the main draw of the pattern is probably the cute jumper, the T-shirt is just right for what I need.
Picture
  I first made the shirt for Max’s SuperWhy! costume for Halloween, which I wrote about here.  But now I’m making him some versions (without the fancy SuperWhy! logo) that he can wear to preschool or around the house. Here is my first attempt (and don't ask me where his other sock is).
Picture
 I think my problem with my own pattern attempts was that I was making the neckband too wide, and not under-stitching the right way. (This pattern leads you through how to under-stitch, if you don’t know what I’m talking about, though I don’t think it calls it that.)  

For this version, I decided to do faux layered sleeves, since that seemed to add a good “boy” element. It’s very simple to do: I just folded the sleeve pattern piece at the line where it says to cut for short sleeves, and added a half-inch at the bottom for the hem. I cut two sleeves (from the main fabric) using that. Then I re-folded the sleeve pattern piece so that I was cutting just the bottom part of the sleeve, and I added about a half-inch at the top for the seam. I cut two sleeve bottoms out of my contrast (grey) fabric. To make the sleeve: I folded the bottom edge of the top sleeve piece under 1/2” and pressed. Then I placed the top raw edge of the bottom contrast piece flush with the top raw edge of the fold on the wrong side and stitched it. That way, you’re hemming the top part of the sleeve and attaching the bottom part in just one step.

I also added a pocket—just a basic 3 – 1/2” square, top-stitched all around, with multiple lines of top-stitching in contrasting thread (I actually didn’t do that great of a job keeping these lines perfectly straight). I was considering getting rid of the snaps on the shoulder because the neck hole seemed large enough, but then I realized that the snaps would prevent the neck from getting stretched out. Oh, I also had to add length to the bottom of the shirt—about two inches. (I still took a 1 – 1/4” hem.)

I used Jo-Ann’s Sew Classic Knit fabric (I think this is it), which I love because it’s super soft, but not so flimsy as to be difficult to work with. They often run it 40% or 50% off. If you want more info on finding knits, check out Meg’s excellent post on knits at Sew Liberated. 

I’ve got more knits and more T-shirt customizing ideas. Next up: creating stripes!